Multiband compressor – Xfer OTT

Xfer-OTT multiband compressor

Xfer-OTT multiband compressor

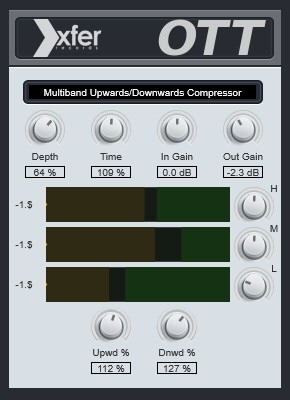
Available from Xfer Records (and a variety of other places) the free,  OTT (Over The Top) plugin is a multiband compressor. Practically, for me, this means it cleans up any mix on which I use it. If you want to hear how much mid frequencies are muddying up your mix, just drop this plugin onto the master mix, then toggle it on and off.

There is much more to this plugin than that and for the best results, this should be adjusted for each individual mix. In my opinion, for the best results, apply instances to different groups of tracks and not on the master track at all. For example, I might use an instance for the drums, a separate instance for vocals, another for all other instruments (as a group) because each of those tracks or groups of tracks will sound best with a different configuration of OTT.

I’ve listed the steps that are shown in the video, as a reference for use after watching the video. The video that follows, does a very good job of explaining how to use OTT and making it easy to understand how to get good results for your mix.

  1. Adjust the high, mid and low frequency bands. In other words drag the black bars in the middle of the brown and green areas in the middle of the OTT plugin, to the left or right to get the desired boost or cut from each frequency band.
  2. Adjust the upward and downward compression dials at the bottom of the plugin.
  3. Adjust the time dial at the top of the plugin.
  4. Finally adjust the depth dial at the top of the plugin.

A few other things to consider when using this plugin.

Don’t be fooled by a volume increase. Ensure that the volume of your mix is the same with or without the plugin enabled. Louder can sound better even if a plugin isn’t doing anything other than increasing the volume. You want to ensure the tone is better, not just that everything is louder so be sure to adjust the output gain when comparing the mix with and without the plugin enabled.

When you first enable the plugin, your mix might sound worse, but literally after a few seconds spent on step 1 above, you’ll hear an instant improvement.

The following video explains and demonstrates the above steps.
OTT by Xfer Records Overview – by SoundShockAudio

Vocal Harmonizer – Pitchproof

Pitchproof - vocal harmonizer

Pitchproof – vocal harmonizer

From the Pitchproof web site:

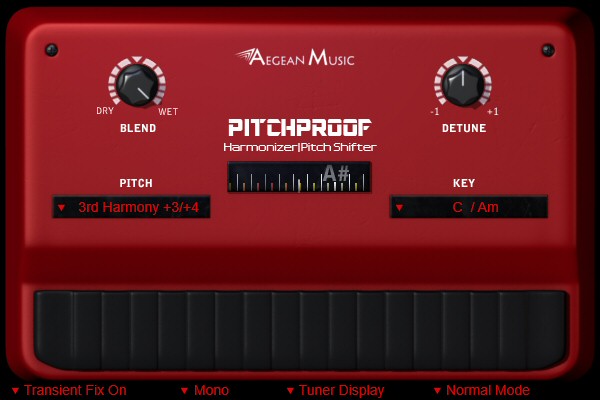
Pitchproof is a free audio plug-in that can shift the pitch of the input. The effect is meant to combine old styles of pitch shifting with the quality you expect from modern plug-ins. The result is this pitch “pedal” simulation that has most of what is great about guitar harmonizer pedals, and still preserves the signal’s integrity.

I use it as a vocal harmonizer. With a few added tricks, the effect is sufficiently convincing in a mix. In isolation it can sound like chipmunks but use the tricks below and blend it appropriately with the lead vocal and you have instant harmony. As outlined in the video below, do the following to improve the quality of the harmony.

  1. Create a new harmony track in your DAW
  2. Create a send from the main vocal track to the harmony track
  3. To the harmony track, add the following plugins:
    • Pitchproof (set to 100% wet, 3rd harmony, key of your song)
    • a pitch shifter, (to shift the formants by about -54 cents – helps reduce the chipmunk effect)
    • an autotuner, (set to autmomatic pitch correction in the key of your song)
    • an EQ. (use high and low pass filters to include only the bulk of the harmony wave form)
    • reverb (to place the harmony track behind the lead vocal)
  4. Pan the harmony track to put the singer to the side of the lead vocal.
  5. Adjust the volume of the harmony track to blend with the lead vocals

The following video by MusicTechHelpGuy demonstrates the above tips.

Create Vocal Harmonies with Pitchproof – by MusicTechHelpGuy

Volume Monitor – rmsPlus

When gain staging, prior to working on the final mix, I find it very helpful to use this large RMS + Peak loudness meter called rmsPlus.

rmsPlus - volume monitor

rmsPlus – volume monitor

Sure, my DAW of choice has volume meters on each track and on the master track, but I just find this particular one, very easy to read and more helpful to me than the built in ones.

I set the PK Hold (peak hold) to 3s and that easily enables me to set the peak volume for each track prior to any adjustments of the volume faders.

Click here to download rmsPlus from a Russian web site (scroll down a little).

[ EDIT (Mar 31, 2017): The above link isn’t working but the page and the download are still available via the “wayback machine” by clicking here ]

I haven’t found this hosted anywhere else. I’ve been using this plugin for a while now (on every tune on my web site actually) with no problems of any kind. If my memory is correct, to install it, you just have to place the rmsPlus.dll file where your DAW looks for plugins.

Sfz player – Sforzando

Sforzando - free sfz player

Sforzando – free sfz player

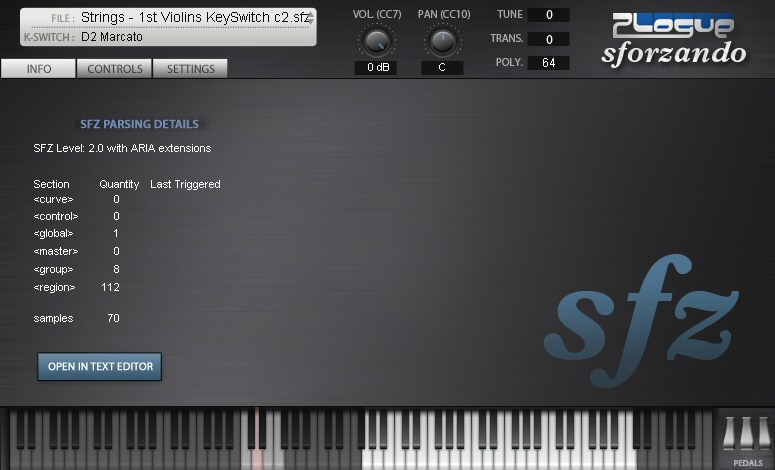
To play an sfz based sample library, you need an sfz player. (this is sometimes confused with a soundfont which needs a soundfont player based on the .sf2 format). For a while, the common choice for an.sfz sample player was the free sfz player from Cakewalk.

There is a problem though. The version of that .sfz player from Cakewalk, doesn’t permit more than one instance at a time which means you could only use one instrument at a time.

A fix (sometimes called multi-core sfz) was created to allow multiple instances and therefore multiple instruments. Who created it I don’t know but curiously Cakewalk still only provides the single instrument version although if you search, you might find the multi-core sfz version.

Cakewalk rgs:audio - free  sfz player

Cakewalk rgs:audio – free sfz player

But now there is the free Sforzando from Plogue. Sforzando is a relatively new (at the time I’m writing this) sfz player that to me, seems better than even the Multi-core sfz player. Sforzando permits multiple instances, requires less CPU time than Multi-core sfz, and would also appear to be under active development whereas Mutli-core sfz seems to be a long dead project.

Another advantage to Sforzando is the support for key switching. This enables you to press a key and select a different articulation or different instrument provided that the sample library has been programmed for that feature. Personally I find this feature essential for orchestral instruments.

Spectrum Analyzer

Seven Phases Spectrum Analyzer

Seven Phases Spectrum Analyzer

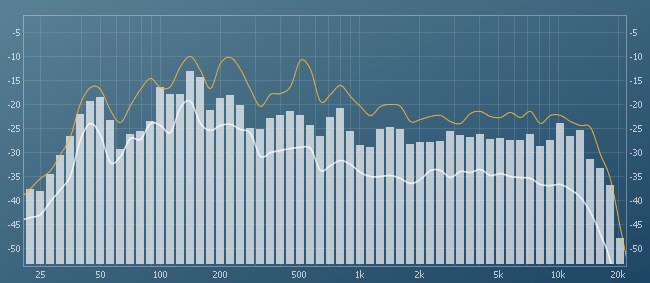
This is a simple and handy free tool for checking that your mixes are balanced in the frequency spectrum. A mix with too much bass or too much treble or perhaps even too little mid range, can distract from the music.

This provides real time display of peak, current and average frequency levels. Attach this to your master track, open it and let your song play. Adjust your EQ in real time and instantly see (and of course hear) the difference.

A spectrum analyzer can also be used to check if two instruments are competing for the same frequency space.

Visit Spectrum Analyzer web site

See the video below for a demonstration of it’s use.

Compressor – GComp2

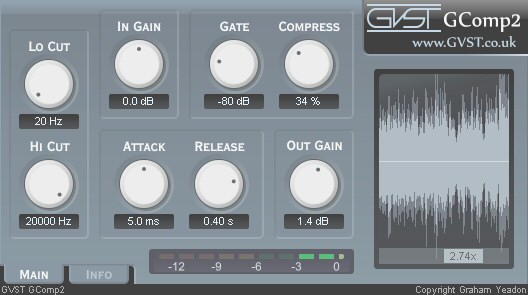
This free compressor from GVST has a very simple interface (sometimes that’s a good thing) and you may find yourself mostly adjusting just the compression percentage knob, but I find it comes in handy fairly often both on instrument tracks and as a bus compressor.

GComp2 - free compressor

GComp2 – free compressor

It’s often repeated that you should use your ears and not your eyes when mixing but I find it handy to see just how spikey a waveform is to indicate if it would benefit from some compression.

The waveform in the box on the right, updates in real time and you can instantly see the effect of any changes to the settings. The lightly coloured waveform is the compressed wave and behind it, in a darker colour is the uncompressed wave.

I only have 2 issues with this plugin. The interface is a little small and dark (I’ve brightened the above image), but I can live with it. It’s worth a look. It does help that the small slider under the image (that currently reads 2.74% – that’s a zoom factor) can be used to zoom in on the wave form.

Check it out and download it for free from the Gcomp2 download page.