This is a 5 minute video by Alan Belkin that takes a short piece of music consisting of a melody with accompanying counterpoint written for flute and trombone and shows how to break it up to be played by a full string section, woodwinds and timpani. The point of the video is to show what makes for good orchestration.
Tag: Article
Video – Composition Screen Cast (Michael Patti)
This is an approximately half hour video by Michael Patti showing a short cinematic composition created in real time. This provides a good example of layering and doubling various orchestra ensembles.
I’d don’t record entire ensembles at a time myself because I want to think about what each section is playing so I don’t end up with more strings playing than what an orchestra actually contains but this shows an interesting way to generate ideas and get some results quickly which I believe is the main intent of this video.
CineSymphony LITE Composition Screencast by Michael Patti
Volume Monitor – rmsPlus
When gain staging, prior to working on the final mix, I find it very helpful to use this large RMS + Peak loudness meter called rmsPlus.
Sure, my DAW of choice has volume meters on each track and on the master track, but I just find this particular one, very easy to read and more helpful to me than the built in ones.
I set the PK Hold (peak hold) to 3s and that easily enables me to set the peak volume for each track prior to any adjustments of the volume faders.
Click here to download rmsPlus from a Russian web site (scroll down a little).
[ EDIT (Mar 31, 2017): The above link isn’t working but the page and the download are still available via the “wayback machine” by clicking here ]
I haven’t found this hosted anywhere else. I’ve been using this plugin for a while now (on every tune on my web site actually) with no problems of any kind. If my memory is correct, to install it, you just have to place the rmsPlus.dll file where your DAW looks for plugins.
Video – Let’s Write Music (JJay Berthume)
This is a 6 part video series by JJay Berthume where he starts from a blank page and composes a heroic style piece of music called “Defending Our Homeland” Much like the Video Composition by Joe Carillo I previously mentioned on my blog, this steps through the process of composing and orchestrating an original piece of music from the beginning.
Let’s Write Music! EP1 (Part 1: Melodic Sketch) by JJay Berthume
Here are links to all 6 parts of the Youtube video series:
Let’s Write Music Part 1
Let’s Write Music Part 2
Let’s Write Music Part 3
Let’s Write Music Part 4
Let’s Write Music Part 5
Let’s Write Music Part 6
Sfz player – Sforzando
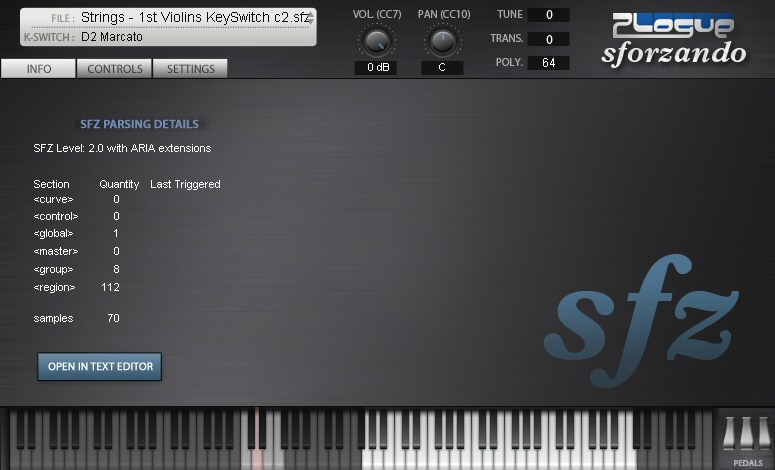
To play an sfz based sample library, you need an sfz player. (this is sometimes confused with a soundfont which needs a soundfont player based on the .sf2 format). For a while, the common choice for an.sfz sample player was the free sfz player from Cakewalk.
There is a problem though. The version of that .sfz player from Cakewalk, doesn’t permit more than one instance at a time which means you could only use one instrument at a time.
A fix (sometimes called multi-core sfz) was created to allow multiple instances and therefore multiple instruments. Who created it I don’t know but curiously Cakewalk still only provides the single instrument version although if you search, you might find the multi-core sfz version.

Cakewalk rgs:audio – free sfz player
But now there is the free Sforzando from Plogue. Sforzando is a relatively new (at the time I’m writing this) sfz player that to me, seems better than even the Multi-core sfz player. Sforzando permits multiple instances, requires less CPU time than Multi-core sfz, and would also appear to be under active development whereas Mutli-core sfz seems to be a long dead project.
Another advantage to Sforzando is the support for key switching. This enables you to press a key and select a different articulation or different instrument provided that the sample library has been programmed for that feature. Personally I find this feature essential for orchestral instruments.
Daily Film Scoring Bits
Daily Film Scoring Bits was an almost daily blog (now it’s an archive) of orchestration tips from Robin Hoffmann, a composer for film scores and international artists. On a nearly daily basis he offered a new tip or piece of advice regarding the composition, orchestration and technical aspects of creating film scores or orchestra music in general. I’ve read them, all the way back to his first daily post in his 2010 archive.
Even if you have no interest in film scoring in particular, there are plenty of tips on orchestration in general.
Spectrum Analyzer
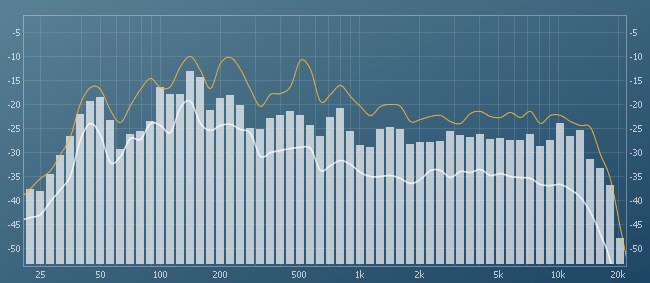
This is a simple and handy free tool for checking that your mixes are balanced in the frequency spectrum. A mix with too much bass or too much treble or perhaps even too little mid range, can distract from the music.
This provides real time display of peak, current and average frequency levels. Attach this to your master track, open it and let your song play. Adjust your EQ in real time and instantly see (and of course hear) the difference.
A spectrum analyzer can also be used to check if two instruments are competing for the same frequency space.
Visit Spectrum Analyzer web site
See the video below for a demonstration of it’s use.
Chord Detector – Chordata
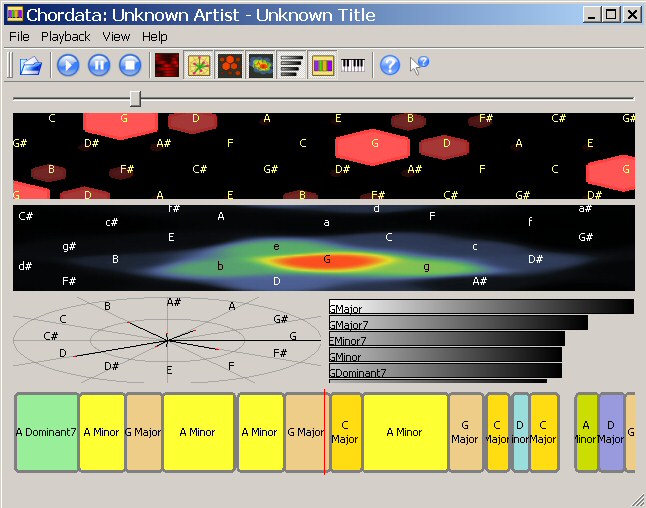
The first thing I do when working on a new song is to map out the structure. I mark where the verses and choruses are so I can more easily navigate through the song. The second thing I do is figure out the chord progression. Depending on the song, that can take a while. To save myself a lot of time (assuming the song writer hasn’t simply told me the chord progression) I make use of the following free tool called Chordata.
The display may look a little complex in places but I focus on the section at the bottom with the chords in the colored rectangles. I simply load an .mp3 or a .wav file into the program, press play and write down the cords. I find it works best if I give it an individual track, like a piano or a guitar so that the chords this program has to detect are as clear as possible. I also tend to give it a single verse or chorus at a time. Navigation within the program is easier that way and It’s also easier to keep track of where I am in the song.
This program has it’s quirks, but does a fairly good job of chord detection and saves me a lot of time. It may make the occasional mistake but generally it’s accurate enough that I keep using it. Check it out:
Meta Tag Editor – Kid3 Audio Tagger
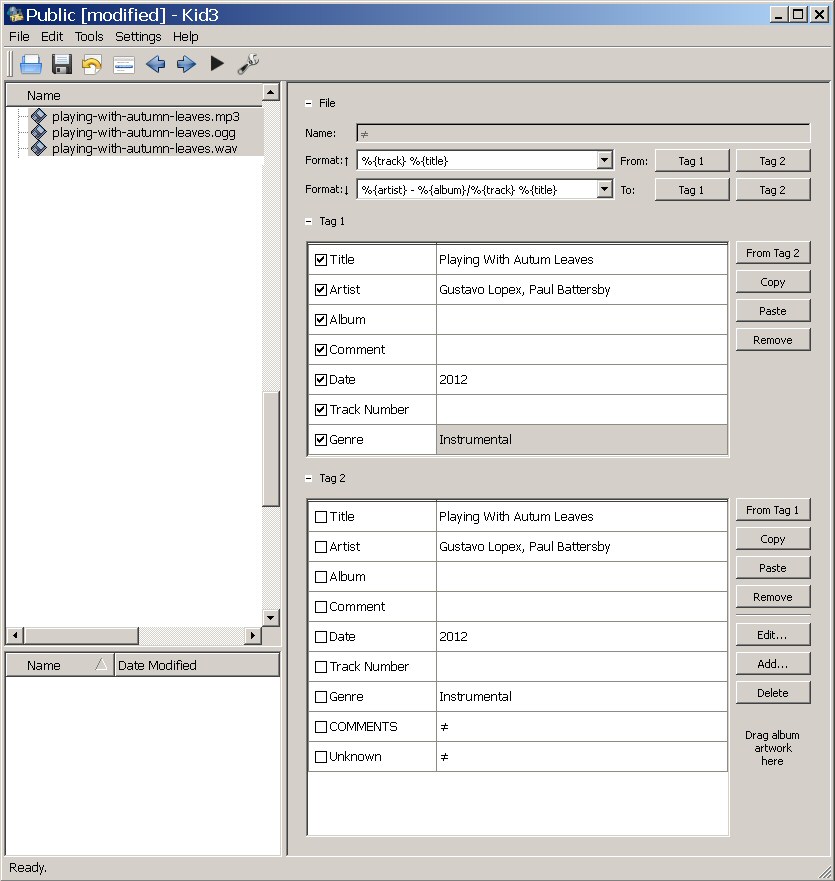
Kid3 Audio Tagger is a free tool for embedding song title, artist, date, genre and various other fields into your .mp3, .ogg, .wav files. Inserting in your song file, this information appears within various music players. I use this on every song I post on my web site.
It’s trivially easy to use. Drag and drop multiple files into the file window, edit the song information and save that information to all the selected audio files.
Visit Kid3 Audio Tagger
Compressor – GComp2
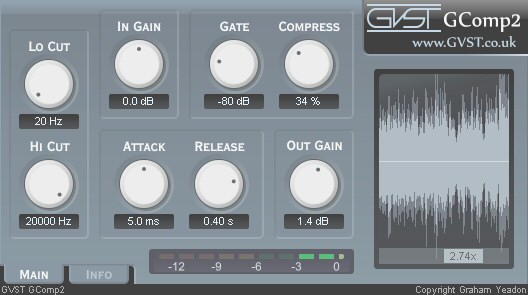
This free compressor from GVST has a very simple interface (sometimes that’s a good thing) and you may find yourself mostly adjusting just the compression percentage knob, but I find it comes in handy fairly often both on instrument tracks and as a bus compressor.
It’s often repeated that you should use your ears and not your eyes when mixing but I find it handy to see just how spikey a waveform is to indicate if it would benefit from some compression.
The waveform in the box on the right, updates in real time and you can instantly see the effect of any changes to the settings. The lightly coloured waveform is the compressed wave and behind it, in a darker colour is the uncompressed wave.
I only have 2 issues with this plugin. The interface is a little small and dark (I’ve brightened the above image), but I can live with it. It’s worth a look. It does help that the small slider under the image (that currently reads 2.74% – that’s a zoom factor) can be used to zoom in on the wave form.
Check it out and download it for free from the Gcomp2 download page.

